This page uses the current portal of the Azure Active Directory, for information on using the classic portal, click here.
- You want to let users into your application from an Azure AD you or your organization controls (e.g. employees in your company).
- You want to let users coming from other companies' Azure ADs into your application. You may set up those external directories manually as different connections, or create a multi-tenant application that accepts new directories dynamically.
NOTE: There is no way to create an application that integrates with Microsoft Azure AD without having your own Microsoft Azure AD instance.
This doc refers to the client steps to connect your client. If you are looking to manage authentication in your application, see Next Steps below.
1. Create a new application
Login to Microsoft Azure and choose Azure Active Directory from the sidebar.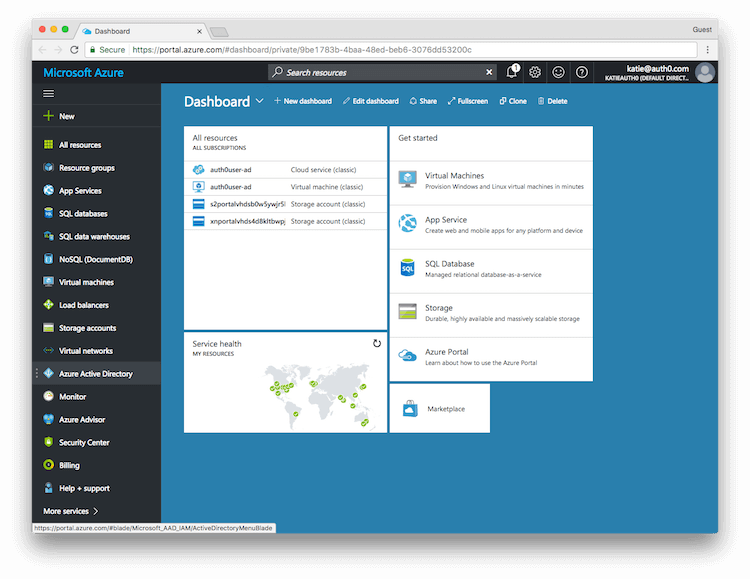
Then under MANAGE, select App registrations.
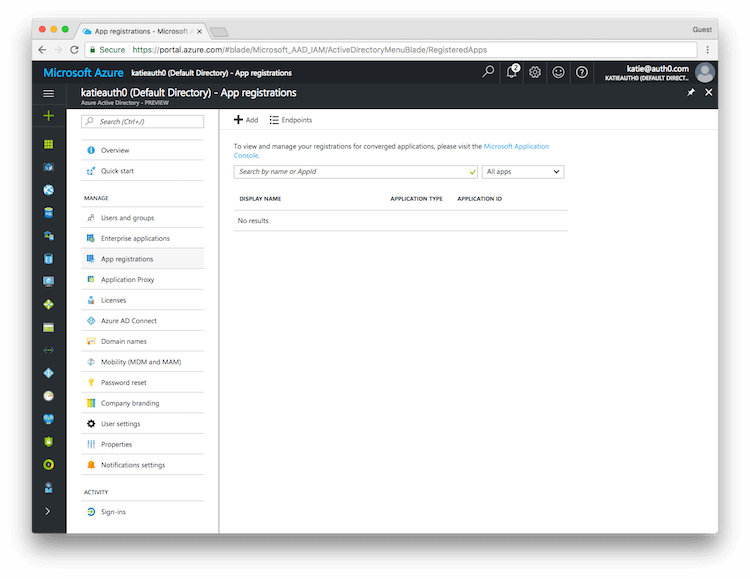
Then click on the + ADD button to add a new application.
Enter a name for the application, select Web app/API as the Application Type, and for Sign-on URL enter your application URL.

2. Configure the permissions
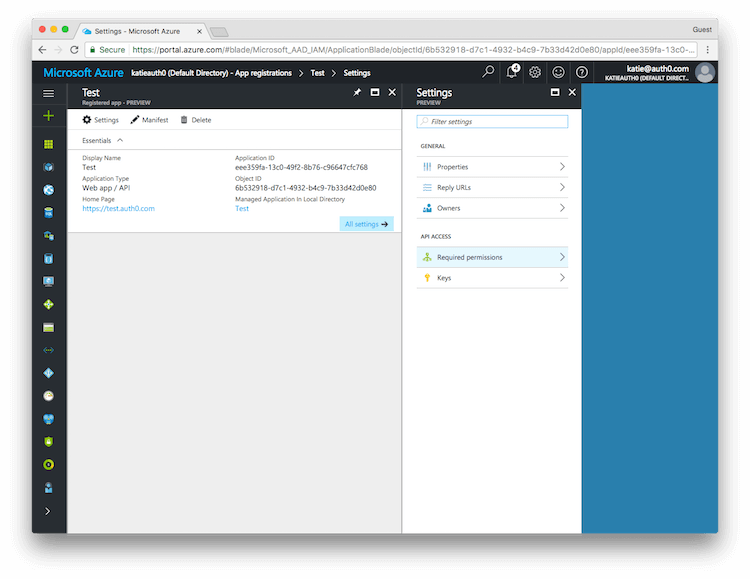
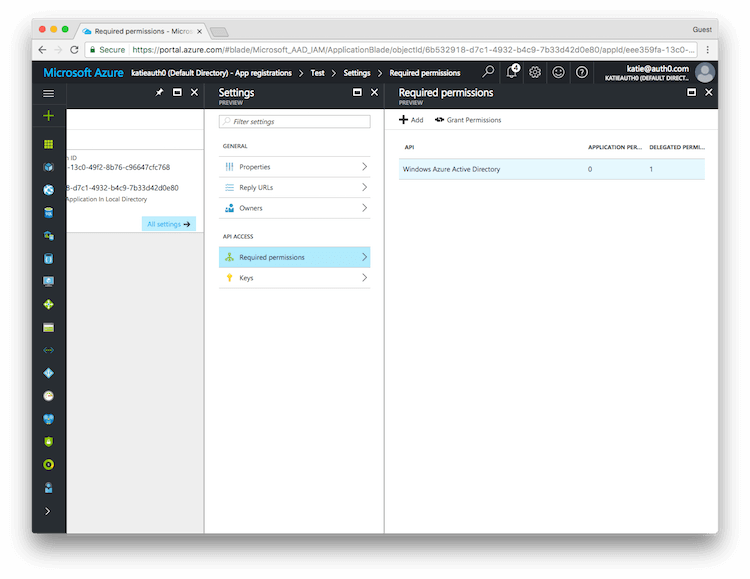
Once the application has been created, you will have to configure the permissions. Click on the name of the application to open the Settings section.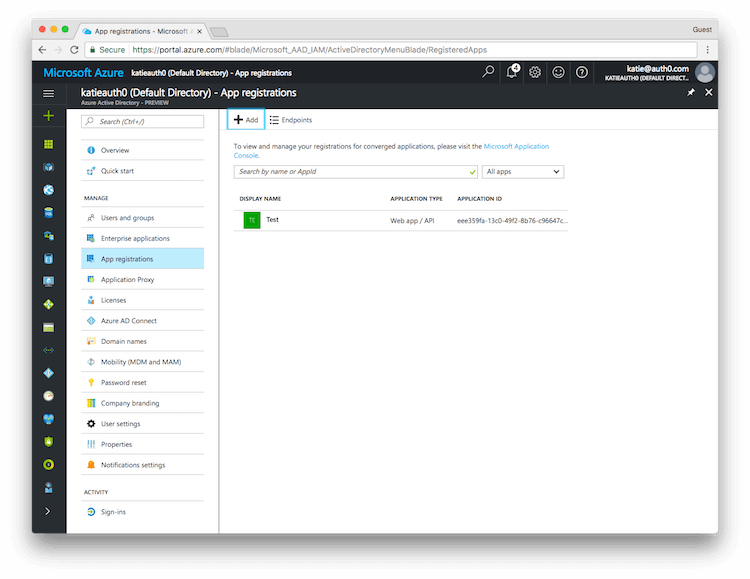
Click Required permissions.
Then click on Windows Azure Active Directory to change the access levels.
The next step is to modify permissions so your app can read the directory. Under DELEGATED PERMISSIONS check next to Sign in and read user profile and Read directory data.
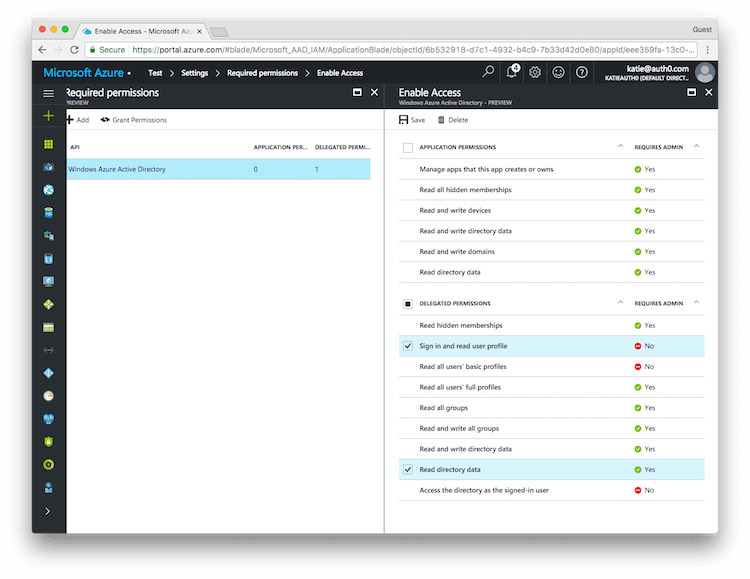
NOTE: If you want to enable extended attributes (like Extended Profile or Security Groups) you will also need to enable the following permissions: Application Permissions: Read directory data, Delegated Permissions: Access the directory as the signed-in user.
Click the SAVE button at the top to save these changes.
3. Allowing access from external organizations (optional)
If you want to allow users from external organizations (i.e. other Azure directories) to log in, you will need to enable the Multi-Tenant flag for this application. In the Settings section, click Properties. Locate the Multi-tenanted toggle at the bottom and select Yes. Finally click the SAVE button at the top to save these changes.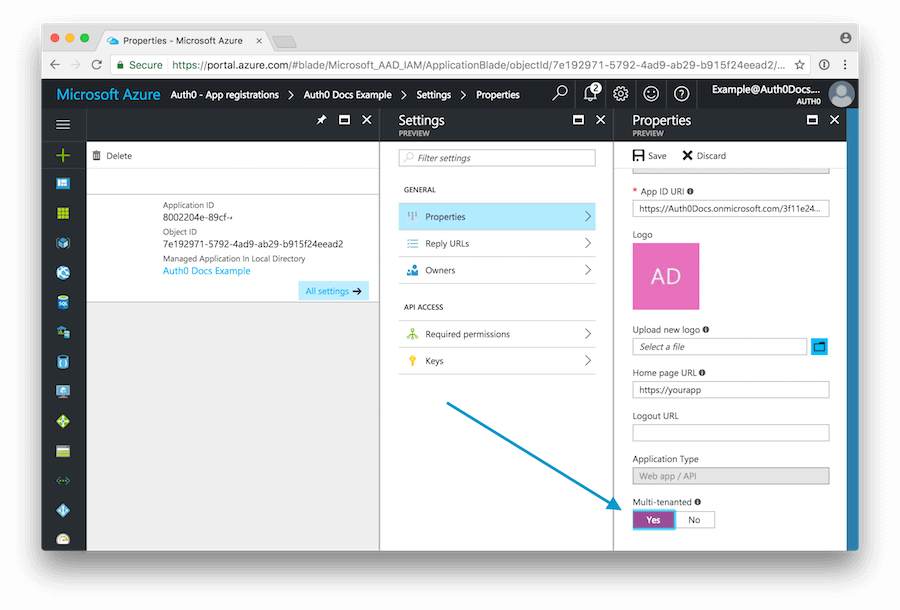
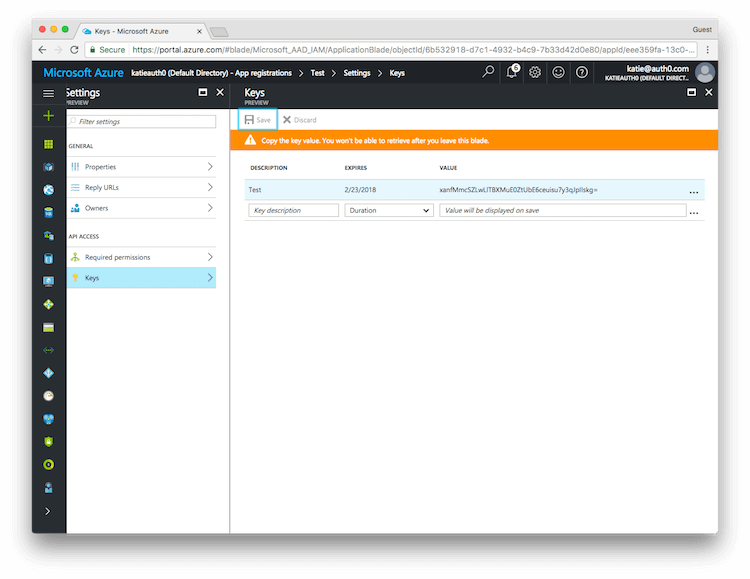
4. Create the key
Next you will need to create a key which will be used as the Client Secret in the Auth0 connection. Click on Keys from the Settings menu.
Enter a name for the key and choose the desired duration.
NOTE: If you choose an expiring key, make sure to record the expiration date in your calendar, as you will need to renew the key (get a new one) before that day in order to ensure users don't experience a service interruption.
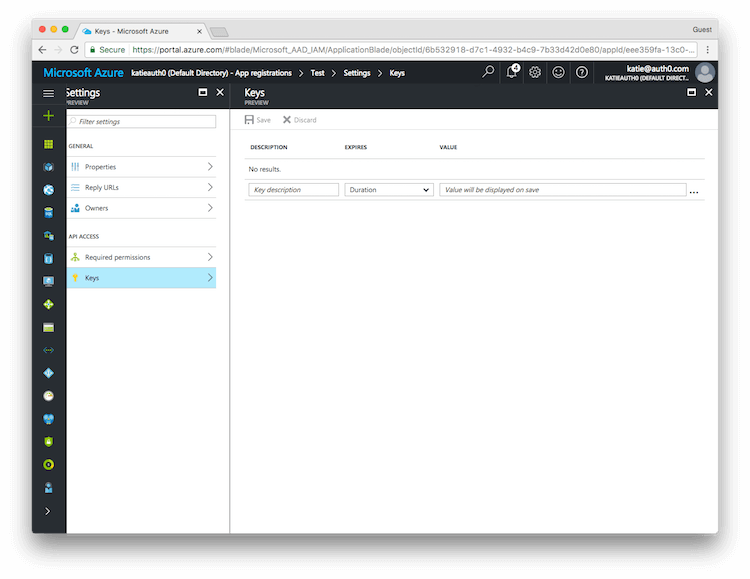
Click on Save and the key will be displayed. Make sure to copy the value of this key before leaving this screen, otherwise you may need to create a new key. This value is used as the Client Secret in the next step.
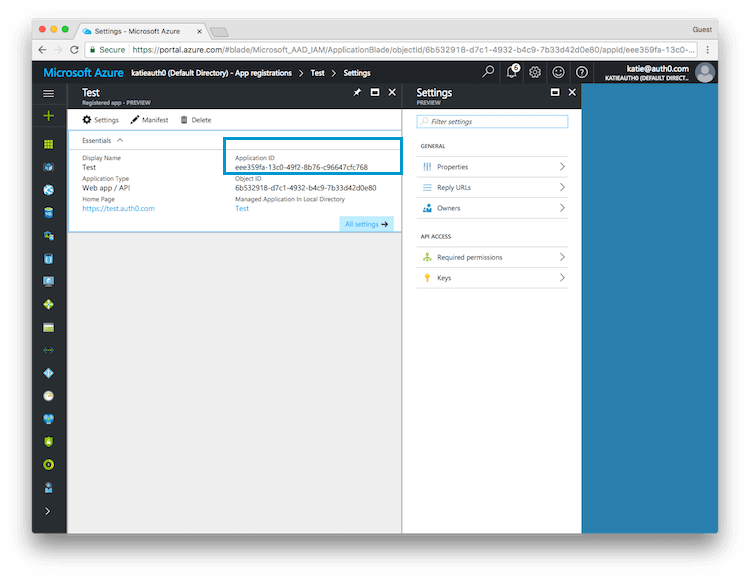
5. Copy the Client ID and Client Secret to Auth0
Login to your Auth0 Dashboard, and select the Connections > Enterprise menu option. Select Windows Azure AD. In the Configuration tab you will configure global settings, including data about the app registration you just created in Auth0.
For the Client ID, this value is stored as the Application ID in Azure AD.
For the Client Secret use the value that was shown for the key when you created it in the previous step.
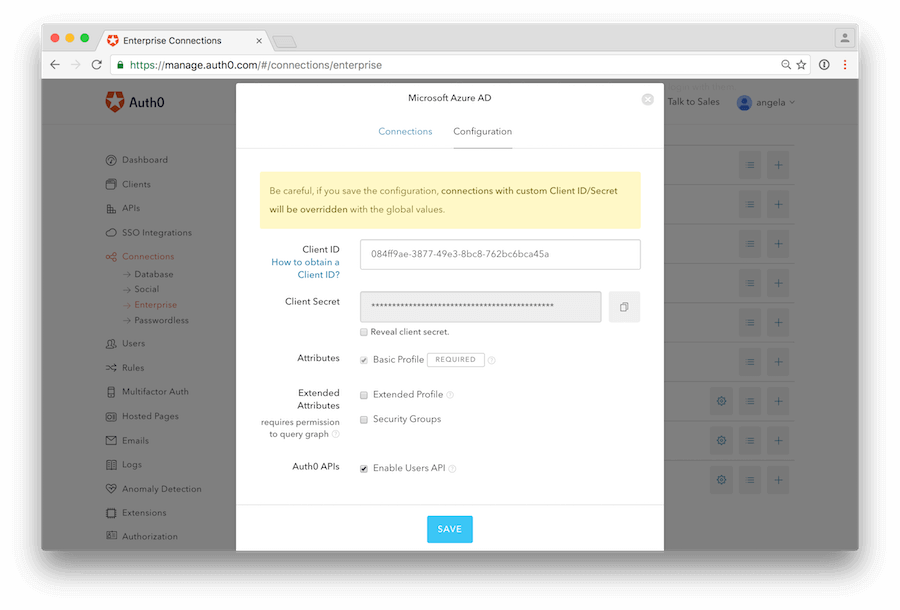
Click SAVE when you have finished.
6. Create Connections
After configuring the global settings that link Auth0 to the app registration in Azure AD, you will create one or more connections. Go to Connections->Enterprise and click on the CREATE NEW button next to Microsoft Azure AD.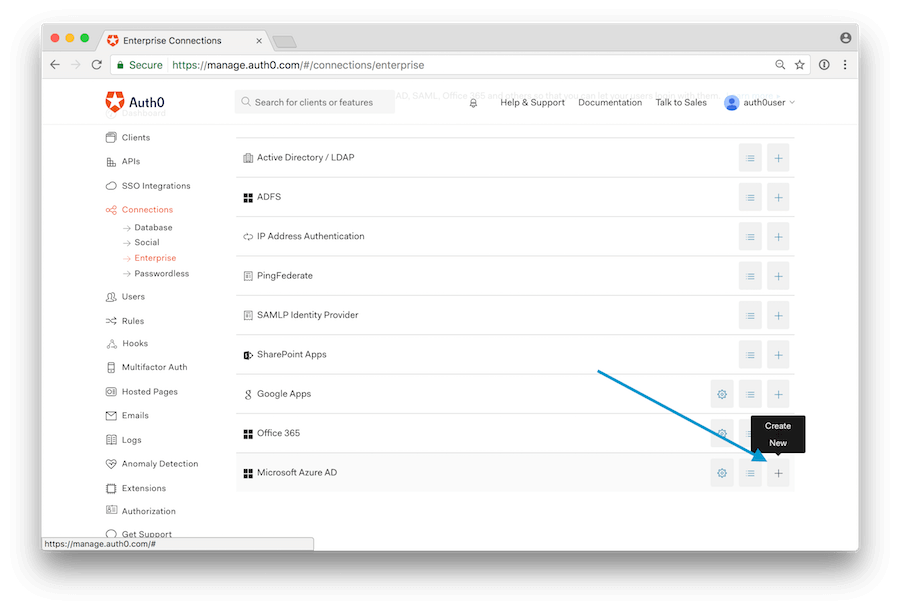
Set the name of the Microsoft Azure AD Domain and under Domain Aliases put any email domain that corresponds to the connection.
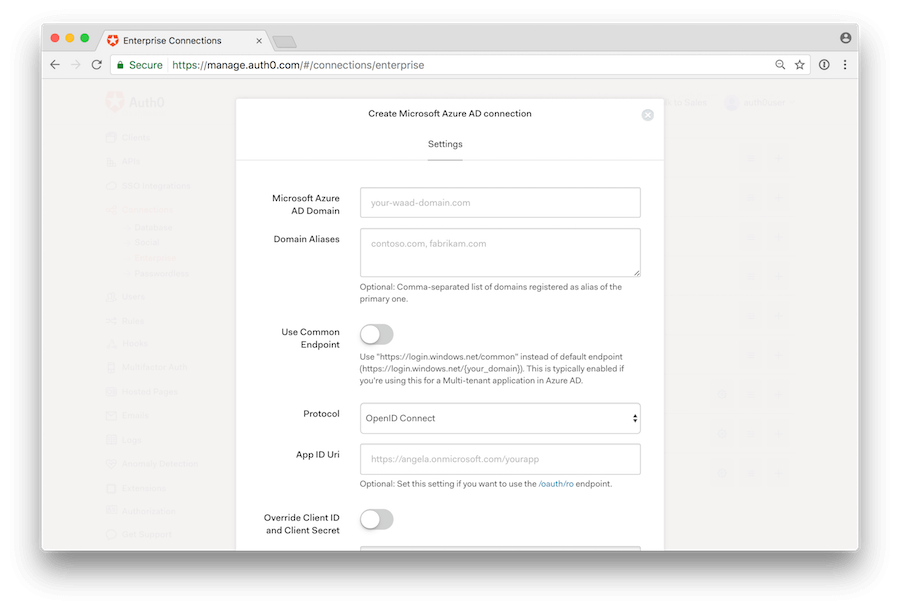
Multi-tenant applications: if you are creating multi-tenant applications where you want to dynamically accept users from new directories, you will setup only one connection and enable the Use Common Endpoint toggle. By enabling this flag, Auth0 will redirect users to Azure's common login endpoint, and Azure itself will be doing Home Realm Discovery based on the domain of the email address.
Then choose the protocol. Open ID Connect is the default, and should be selected in the majority of cases. This is independent of the protocol that your application will use to connect to Auth0.
Next complete the App ID Uri field if you intend to use active authentication.
Click the SAVE button. Auth0 will provide you with an URL that you will need to give to the Azure AD administrator. This URL will allow the administrator to give consent to the application so that users can log in.
Congratulations! You are now ready to accept Microsoft Azure AD users.
Troubleshooting
- Make sure you are in the desired directory to add you application. If you do not have an existing directory you will need to create one.
- When granting access, make sure to use an Incognito/InPrivate window and a Global Administrator user.
- If you get Access cannot be granted to this service because the service listing is not properly configured by the publisher, try enabling Multi Tenanted in the Windows Azure AD application under Settings -> Properties.
Signing Key Rollover in Azure Active Directory
Signing keys are used by the identity provider to sign the authentication token it issues, and by the consumer application (Auth0 in this case) to validate the authenticity of the generated token.For security purposes, Azure AD’s signing key rolls on a periodic basis. If this happens, you do not need to take any action. Auth0 will use the new key automatically.
Next Steps
Now that you have a working connection, the next step is to configure your application to use it. You can initiate login using Lock, Auth0.js, or the Authentication API endpoint.For detailed instructions and samples for a variety of technologies, refer to our quickstarts:
- Quickstarts for Mobile / Native Apps
- Quickstarts for Single Page Apps
- Quickstarts for Web Apps


No comments:
Post a Comment