Introduction
I am currently going through the architectural process of enabling 3rd party claims authentication via both active directory and a custom authentication store. This is a common requirement for the enterprise where a users primary login is not necessarily active directory. This complex scenario enables a single user to login via both an application account or the windows account, providing ultimate authentication flexibility.
So, how is this achieved via ADFS 2.0?.. The honest answer is it isn’t. ADFS does not provide a pluggable model for custom authentication and only supports active directory authentication out of the box. Custom authentication needs to be provided via the utilisation of a custom Trusted STS and ADFS 2.0. Producing a reliable STS is no simple feat, the management, security and protocol support required to produce a working token service is a lot of work. Luckily for us, Dominick Baier (@leastprivilege) has taken all of this pain away via Identity Server 2.0.
Identity server 2.0 is an Open Source STS providing the ability to “swap out” elements of the architecture and wrap a custom identity store. Once wrapped, this store can be accessed via the claims protocols (WS-Trust) and provide alternative authentication tokens. These tokens can be used to sign-in to ADFS and authenticate the user. With authentication complete, subsequent claims transforms can be applied inside ADFS. This is a challenging use-case, not one for the feint hearted.
In the first part of this 2 part series I will configure ADFS 2.0 and Setup the relying party trust to an ASP.NET MVC application. In the 2nd part in the series I will install identity server v2 and modify the ADFS forms process to delegate access to the identity server provider via WS-Trust.
Environment
To get started you will need a Windows 2012 domain server, Windows 8 (IIS configured with a self-signed cert) and Visual Studio 2012 along with Identity Server 2.0. Knowledge of ASP.NET MVC 4.0 and Windows Identity Foundation is a bonus.
Identity Server can be downloaded from here.
- On the Windows 2012 Server, Add the ADFS 2.0 role and configure a self-signed IIS certificate with the correct bindings. This is explained exceptionally on the sysadminblog. Installing ADFS 2.0
- Once installed, install and configure identity server as described in the video athttp://vimeo.com/51088126.
- .NET 4.5 and Windows 8 ship with WIF.
- Visual Studio 2012 ships with ASP.NET MVC 4.0, to make life easy to you enable the “Identity and Access Tool” from Tools, Extensions and Updates extension manager. This provides an application level menu to configure your .NET application against the new federation service.
Configuring ADFS 2.0 for Forms Authentication
ADFS 2.0 by default is configured to hook directly into your existing active directory via integrated security through the browser. To utilise the ability to login to the 3rd party STS (IdentityServer) you need to change the default configuration to Forms (more on this in part 2). This is achieved by modifying the ADFS web.config (Found at c:\inetpub\adfs\ls\web.config) authentication preference (as below). You can also achieve this directly by embedding the authentication type into authenticating applications url via the wauth parameter. I.E: https://windows2012/adfs/ls?wauth=Forms<microsoft.identityServer.web> <localAuthenticationTypes> <add name="Forms" page="FormsSignIn.aspx" /> <add name="Integrated" page="auth/integrated/" /> <add name="TlsClient" page="auth/sslclient/" /> <add name="Basic" page="auth/basic/" /> </localAuthenticationTypes> <commonDomainCookie writer="" reader="" /> <context hidden="true" /> <error page="Error.aspx" /> <acceptedFederationProtocols saml="true" wsFederation="true" /> <homeRealmDiscovery page="HomeRealmDiscovery.aspx" /> <persistIdentityProviderInformation enabled="true" lifetimeInDays="30" /> <singleSignOn enabled="true" /> </microsoft.identityServer.web>
Take note of the FormsSignIn.aspx page, this one of very few customisation points in ADFS 2.0. We will be using this later to redirect our credentials to our 3rd party STS.
With ADFS configured, take note of the metadata address from the ADFS management console. This is found under the service, endpoints folder, for the purposes of this post we will use the Federation Metadata endpoint. As you can’t copy this from the MMC, here is the endpoint suffix:
/FederationMetadata/2007-06/FederationMetadata.xml
Creating the ASP.NET MVC 4.0 Application
In order to test the demonstration we will need a sample harness. An easy option to demonstrate this process is to create our own claims enabled application. To create this application launch visual studio (as an Administrator) and create a new blank basic ASP.NET MVC 4 application. Add this application to IIS, this makes the process easier.
Please ensure you have added the “Identity and Access Tool” from Tools, Extensions and Updates extension manager.

In the project options ensure your application is using IIS. This process does work under IIS Express, this is my personal preference as configuring certificates is easier inside IIS.

Once loaded, right click on the project and select the Identity and Access option.
 Once clicked, you will need the metadata URL from above, everything else will be configured automatically based on your application URL. You may desire to change the application realm (configuration tab), this can be done after metadata configuration.
 Once complete your web.config will be modified. The modifications provide the details of the identity provider and changes the application authentication settings and paths to allow for claims authentication. This is a fairly self-explanatory configuration consisting of the audience (your application root URL), The public certificate thumbnail of the issuing identity provider, and the redirection address to the identity provider for authentication (issuer). Realm is the relying party (service-provider) key (name) given to the identity provider to identify your application.
  <system.identityModel>
    <identityConfiguration>
      <audienceUris>
        <add value="http://localhost/Claims.Test/" />
      </audienceUris>
      <issuerNameRegistry type="System.IdentityModel.Tokens.ConfigurationBasedIssuerNameRegistry, System.IdentityModel, Version=4.0.0.0, Culture=neutral, PublicKeyToken=b77a5c561934e089">
        <trustedIssuers>
          <add thumbprint="THUMBNAIL OF CERT" name="http://IdServ/adfs/services/trust" />
        </trustedIssuers>
      </issuerNameRegistry>
    </identityConfiguration>
  </system.identityModel>
  <system.identityModel.services>
    <federationConfiguration>
      <cookieHandler requireSsl="false" />
      <wsFederation passiveRedirectEnabled="true" issuer="https://IdServ/adfs/ls/" realm="http://localhost/Claims.Test/" requireHttps="false" />
    </federationConfiguration>
  </system.identityModel.services>
The identity and access tool also adds the following settings to your application settings section.
    <add key="ida:FederationMetadataLocation" value="https://idserv/FederationMetadata/2007-06/FederationMetadata.xml" />
    <add key="ida:Issuer" value="https://Idserv/adfs/ls/" />
    <add key="ida:ProviderSelection" value="productionSTS" />
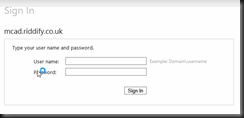
With the above complete, when you run the application you should be presented with the default ADFS login authentication homepage as below. At this point the login process will fail as you have not configured the “relying party trust” in ADFS 2.0. ADFS does not know whether the user has access to the relying application. As articulated in my previous post, relying party is a MS linguistic, service-provider is more environment agnostic.

 Now your application is configured you need to configure the relying party trust in ADFS 2.0. On your ADFS server, browse to the ADFS 2.0 MMC and select Relying Party Trusts, Add Relying Party Trust. This will launch the relying party configuration wizard.
Screen 1, enter data manually
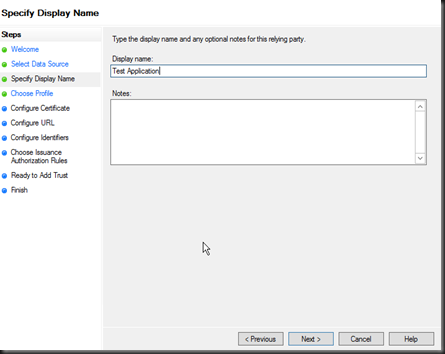
Screen 2, Give your application a meaning full name and description.
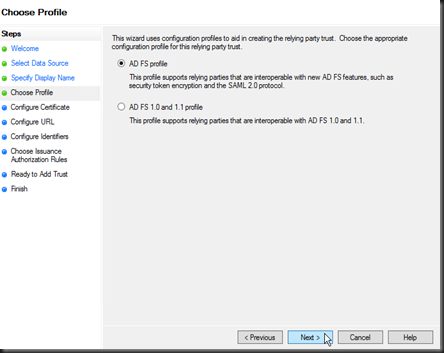
Screen 3, Select ADFS profile
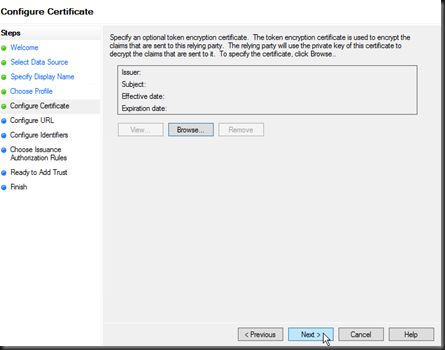 Screen 4, Click next. This screen is used to configure the public key provided by your application to encrypt the token send from the identity provider. For the purposes of this post we will not be encrypting tokens.
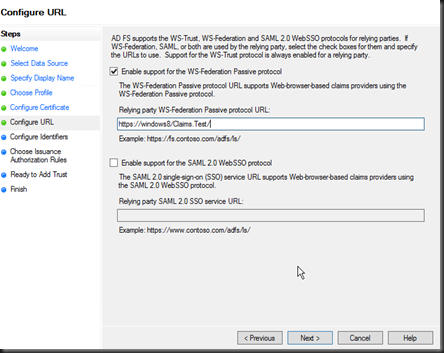 Screen 5, provide the endpoint URL for your relying application. This is the home URL as WIF utilises the ASP.NET authentication module architecture to intercept and validate tokens. For this demo I am working from a host called Windows 8.
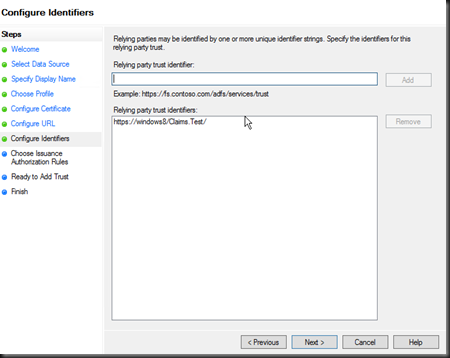 Screen 6, add the trust identifier (this is the realm as configured above). The realm is send in the federation url to determine the relying party configuration to utilise at the IDP.
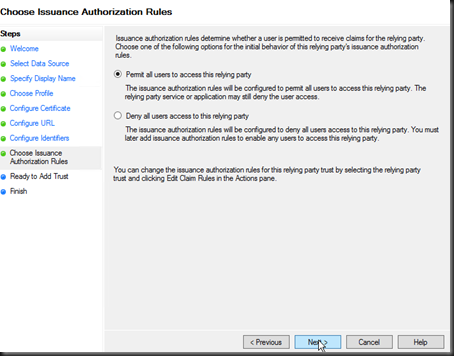 Screen 7, configure the users to access the relying party (service-provider). Permit all users initially, this can be changed by utilising authorisation rules in ADFS.
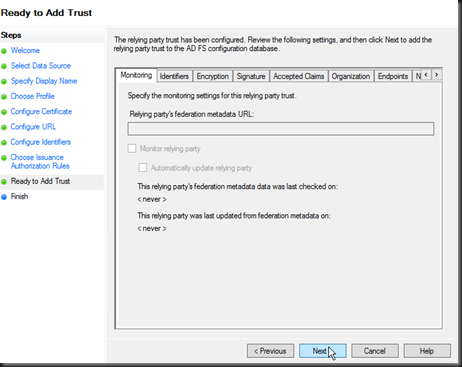 Screen 8, Verify your settings and save the Trust, ensuring you open the claim Edit claim rules dialog.
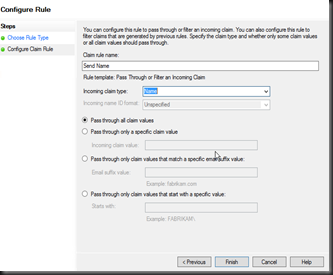
You will now be able to login to your application, although at this point no claims have been configured so it is rather useless. The next dialog provides you the ability to configure and forward claims to the relying application. Without any claims your application will see no authentication properties. Below I configure the Name claim to be sent to the ASP.NET application, this is then presented in the ASP.NET Thread.CurrentPrincipal.Name property.
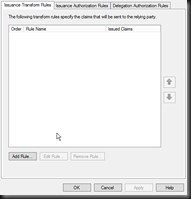
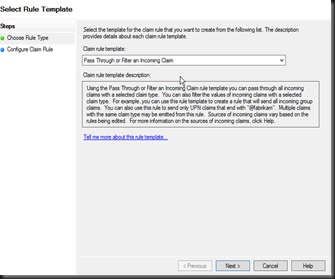
Add Rule (Opens Rule Template Wizard)
Pass Through or Filter Claim Selection.
Call the rule “Send Name” and select the Name claim type. Click Finish
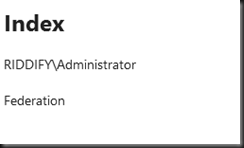
With this now configured your application will be able to login and you should be able to obtain the claim name presented within ASP.NET. If you used the blank ASP.NET MVC 4 template, add a new home controller and copy the code below into the Home View.
@{
    ViewBag.Title = "Index";
}

<h2>Index</h2>

<p>
    @System.Threading.Thread.CurrentPrincipal.Identity.Name
</p>

<p>
@User.Identity.AuthenticationType
</p>
Once launched and logged in, you have completed the ADFS 2.0 application configuration process. Well Done!
Part 2, takes this to another level by modifying the ADFS 2.0 FormsSignIn.aspx to delegate authentication to Dominick Baiers (@leastprivilege) Identity Server v2, enabling custom credential stores.



No comments:
Post a Comment