Last week I’ve read the great
Angular 2 book from Ninja Squad. Therefore, I figured it was time to put pen to paper and start building Angular 2 applications using TypeScript. That’s why in this tutorial, we’ll learn how to start an Angular 2 project from scratch and go further by building a development environment with Webpack and more.
Getting Started
1. Developing and Building a TypeScript App
Let’s start by building our first Angular 2 application using Typescript. First, make sure you have Node.js and npm installed. You can refer to the
official website for more information about the installation procedure. Then, install Typescript globally via npm by running the following command in your terminal :
|
|
npm install -g typescript
|
Once it is installed, we’ll setup our Typescript project by creating a
tsconfig.json file in which we specify the
compilation options to use for compiling our project. The typescript NPM module we just installed comes with a compiler, named
tsc, that we are going to use for initializing a fresh Typescript project :
|
|
# Create a new project folder and go inside it
mkdir angular2-starter && cd angular2-starter
# Generate the Typescript configurations file
tsc --init --target es5 --sourceMap --experimentalDecorators --emitDecoratorMetadata
|
Running tsc --init create the tsconfig.json in our project directory, which looks like this :
1
2
3
4
5
6
7
8
9
10
11
12
13
14
15
16
17
|
{
"compilerOptions": {
"target": "es5",
"sourceMap": true,
"experimentalDecorators": true,
"emitDecoratorMetadata": true,
"module": "commonjs",
"noImplicitAny": false,
"outDir": "built",
"rootDir": "."
},
"exclude": [
"node_modules"
]
}
|
Along with the --init parameter, we passed the following options to the compiler :
--target es5 : specify that we want our code to transpile to ECMASCRIPT 5. Thus, it could be run in every browser.--sourceMap : generate source maps files. It helps when debugging ES5 code with the original Typescript code in the chrome devtools.--experimentalDecorators and --emitDecoratorMetadata : allow to use Typescript with decorators.
Also notice that options such as module, outDir or rootDir have been added by default. Feel free to read the
documentation for more compiler options.
Okay, so now that we are all setup with Typescript, we need to include the
Angular 2 framework. We’ll use npm to install it locally.
So hit npm init
|
|
npm install --save angular2
|
You should now have a package.json
1
2
3
4
5
6
7
8
9
10
11
12
13
14
15
16
17
18
19
20
21
22
23
|
{
"name": "angular-starter",
"version": "1.0.0",
"description": "An Angular 2 Starter kit featuring Angular 2, TypeScript, and Webpack by EloquentWebApp",
"main": "index.js",
"dependencies": {
"es6-shim": "^0.35.0",
"angular2": "^2.0.0-beta.15",
"reflect-metadata": "^0.1.2",
"zone.js": "^0.6.11",
"rxjs": "^5.0.0-beta.2"
},
"devDependencies": {},
"scripts": {
"test": "echo \"Error: no test specified\" && exit 1"
},
"author": "Grégory D'Angelo",
"license": "ISC"
}
}
|
As you can see, angular2 comes with the following dependencies :
- reflect-metadata : used to enable dependency injection through decorators
- es6-shim and es6-promise : librairies for ES6 compatabilities and support for ES6 Promise
- rxjs : a set of librairies for reactive programming
- zone.js : used to implement zones for Javascript, inspired from Dart. Angular 2 uses it to efficiently detect changes
The fundamentals settings are now in place. Let’s create our first Angular 2 application.
2. Creating our First Component
The first step is to create a Typescript file at the root folder, and name it app.component.ts.
Our application itself will be a component. To do so, we’ll use the @Component decorator by importing it from ‘angular2/core‘. That’s all we need to create our Angular 2 component.
|
|
import { Component } from 'angular2/core';
@Component()
export class AppComponent { }
|
By prefixing the class by this decorator, it tells Angular that this class is an Angular component. In Angular 2, components are a fundamental concept. It is the way we define views and control the logic on the page. Here’s how to do it :
|
|
import { Component } from 'angular2/core';
@Component({
selector: 'app',
template: '<h1>Hello, Angular2</h1>'
})
export class AppComponent { }
|
We passed in a configuration object to the component decorator. This object has two properties : selector and template. The selector is the HTML element that Angular will looking for. Every times it founds one, Angular will instantiate a new instance of our AppComponent class, and place our template.
As you may also notice we export our class at the end. This is our first class so we’ll keep it empty for simplicity.
3. Bootstrapping the App
Finally, we need to launch our application. For this, we only need two things : the Angular’s browser bootstrap method, and the application root component that we just wrote. To separate the concerns, create a new file, bootstrap.ts, and import the dependencies :
|
|
///<reference path="node_modules/angular2/typings/browser.d.ts" />
import { bootstrap } from 'angular2/platform/browser';
import { AppComponent } from './app.component';
bootstrap(AppComponent)
.catch(err => console.log(err));
|
As you can see, we call the bootstrap method, passing in our component, AppComponent.
Moreover, as stated in the
CHANGELOG since 2.0.0-beta.6 (2016-02-11) we may need to add the
<reference ... /> line at the top of our
bootstrap.ts file when using
--target=es5. Feel free to check the CHANGELOG for more details.
Last but not least, we need to create an index.html file to host our Angular application. Start by pasting the following lines :
1
2
3
4
5
6
7
8
9
10
11
12
|
<!DOCTYPE html>
<html>
<head></head>
<body>
<app>Loading...</app>
</body>
</html>
|
For now, it’s a very basic HTML file in which we’ve put the selector <app> that corresponds to our application root component.
But we need to add 2 more things in order to launch our application. Indeed, we need to rely on a tool to load application and library modules. For now, we’ll use
SystemJS as the module loader. We’ll see later in this tutorial how to install and configure
Webpack for our Angular 2 project. And finally, we need to include script dependencies in our HTML file. Let’s do it together step by step.
First, start by installing SystemJS :
|
|
npm install --save systemjs
|
Then, load it statically in the index.html just after angular2-polyfills.
angular2-polyfills is essentially a mashup of
zone.js and
reflect-metadata.
1
2
3
4
5
6
7
8
9
10
11
12
13
14
15
|
<!DOCTYPE html>
<html>
<head>
<script src="node_modules/angular2/bundles/angular2-polyfills.js"></script>
<script src="node_modules/systemjs/dist/system.js"></script>
</head>
<body>
<app>Loading...</app>
</body>
</html>
|
Finally, we need to tell SystemJS where is our bootstrap module and where to find the dependencies used in our application (angular2 and rxjs) :
1
2
3
4
5
6
7
8
9
10
11
12
13
14
15
16
17
18
19
20
21
22
23
24
25
26
27
28
|
<!DOCTYPE html>
<html>
<head>
<script src="node_modules/angular2/bundles/angular2-polyfills.js"></script>
<script src="node_modules/systemjs/dist/system.js"></script>
<script>
System.config({
// we want to import modules without writing .js at the end
defaultJSExtensions: true,
// the app will need the following dependencies
map: {
'angular2': 'node_modules/angular2',
'rxjs': 'node_modules/rxjs'
}
});
// and to finish, let's boot the app!
System.import('built/bootstrap');
</script>
</head>
<body>
<app>Loading...</app>
</body>
</html>
|
OK! We’re done with the settings and we can now compile and run our application.
In order to handle common tasks, include the following npm scripts in the package.json file :
1
2
3
4
5
6
7
8
9
10
11
12
13
14
15
16
17
18
19
20
21
22
23
24
25
26
27
28
|
{
"name": "angular-starter",
"version": "1.0.0",
"description": "An Angular 2 Starter kit featuring Angular 2, TypeScript, and Webpack by EloquentWebApp",
"main": "index.js",
"scripts": {
"start": "concurrently \"npm run watch\" \"npm run serve\"",
"watch": "tsc -w",
"serve": "lite-server"
},
"author": "Grégory D'Angelo",
"license": "ISC",
"dependencies": {
"angular2": "^2.0.0-beta.11",
"es6-promise": "^3.1.2",
"es6-shim": "^0.35.0",
"reflect-metadata": "^0.1.2",
"rxjs": "^5.0.0-beta.2",
"systemjs": "^0.19.24",
"zone.js": "^0.6.5"
},
"devDependencies": {
"concurrently": "^2.0.0",
"lite-server": "^2.1.0"
}
}
|
The watch script runs the TypeScript compiler in watch mode. It watches TypeScript files and triggers recompilation on changes.
The
serve script runs an HTTP server to serve our application, and refresh the browser on changes. I’ve used
lite-server for that purpose. Install it via npm :
|
|
npm install --save-dev lite-server
|
And, the
start run the previous 2 scripts concurrently using the
concurrently npm package :
|
|
npm install --save-dev concurrently
|
So, run
npm start and open your browser to
http://localhost:8080. You should now briefly see “Loading…”, and then “Hello, Angular2” should appear.
Congratulations! We’ve have just finished the first part of this tutorial. Keep going to see how to set a build system using Webpack for working with TypeScript.
Creating a useful project structure and toolchain
1. Project Structure
As far, we’ve built a basic Angular 2 application with the minimum required dependencies and tools. In this section, we’ll refactor our project structure to ease the development of more complex Angular 2 applications.
By the end of this section, you will be able to build your own starter kit to get up and running with Angular 2 and TypeScript fast. More importantly, you will understand how to structure your project and what each tool is responsible for. Sounds great, isn’t it? Let’s do it!
The first step is to revamp the file structure of our project. Here’s how it will look :
1
2
3
4
5
6
7
8
9
10
11
12
13
14
15
16
17
18
19
20
21
|
angular2-starter/
├──src/
| ├──bootstrap.ts
| ├──index.html
| ├──polyfills.ts
│ │
│ ├──app/
│ │ ├──app.component.ts
│ │ └──app.html
│ │
│ └──assets/
│ └──css/
│ └──styles.css
│
├──tsconfig.json
├──typings.json
├──package.json
│
└──webpack.config.js
|
There are some new files, but don’t worry we will dive into each one of them through this section. What’s important for now, it’s to understand that we’ll use the component approach in our application project. This is a great way to ensure maintainable code by encapsulation of our behavior logic. Hence, each component will live in a single folder with each concern as a file: style, template, specs, e2e, and component class.
Before going further let’s reorganize our files as follow :
1
2
3
4
5
6
7
8
9
10
11
12
|
angular2-starter/
├──src/
| ├──bootstrap.ts
| ├──index.html
│ │
│ └──app/
│ └──app.component.ts
│
├──tsconfig.json
└──package.json
|
You should also update the path in bootstrap.ts :
|
|
///<reference path="../node_modules/angular2/typings/browser.d.ts" />
import { bootstrap } from 'angular2/platform/browser';
import { AppComponent } from './app/app.component';
bootstrap(AppComponent)
.catch(err => console.log(err));
|
Great! Now it’s time to dive in into Webpack.
2. Installing and Configuring Webpack
Webpack will replace SystemJS that we have used until now, as a module loader. If you need an explanation on what is Webpack for, I highly recommand you to take a look at the
official documentation. In short, webpack is a module bundler
. “It takes modules with dependencies and generates static assets representing those modules“.
Start with installing webpack, webpack-dev-server, and the webpack plugins locally, and save them as project dependencies :
|
|
# First, remove SystemJS. We don't need it anymore.
npm uninstall --save systemjs
# Then, install Typescript locally
npm install --save typescript
# Finally, install webpack
npm install --save-dev webpack webpack-dev-server html-webpack-plugin copy-webpack-plugin
|
Now, let’s configure Webpack for our development workflow. For this purpose we’ll create a webpack.config.js. Add the following settings in your config file :
1
2
3
4
5
6
7
8
9
10
11
12
13
14
15
16
17
18
19
20
21
22
23
24
25
26
27
28
29
30
31
32
33
34
35
36
37
38
39
40
41
42
43
44
45
46
47
48
49
50
51
52
53
54
55
56
57
58
59
60
61
62
63
64
65
66
67
68
69
70
71
72
73
74
75
76
77
|
var path = require('path');
var webpack = require('webpack');
var CopyWebpackPlugin = require('copy-webpack-plugin');
var HtmlWebpackPlugin = require('html-webpack-plugin');
var ENV = process.env.ENV = 'development';
var HOST = process.env.HOST || 'localhost';
var PORT = process.env.PORT || 8080;
var metadata = {
host: HOST,
port: PORT,
ENV: ENV
};
/*
* config
*/
module.exports = {
// static data for index.html
metadata: metadata,
// Emit SourceMap to enhance debugging
devtool: 'source-map',
devServer: {
// This is required for webpack-dev-server. The path should
// be an absolute path to your build destination.
outputPath: path.join(__dirname, 'dist')
},
// Switch loaders to debug mode
debug: true,
// Our angular app
entry: {
'polyfills': path.resolve(__dirname, "src/polyfills.ts"),
'app': path.resolve(__dirname, "src/bootstrap.ts")
},
// Config for our build file
output: {
path: path.resolve(__dirname, "dist"),
filename: '[name].bundle.js',
sourcemapFilename: '[name].map'
},
resolve: {
// Add `.ts` and `.tsx` as a resolvable extension.
extensions: ['', '.ts', '.tsx', '.js']
},
module: {
loaders: [
// Support for .ts files
{
test: /\.tsx?$/,
loader: 'ts-loader',
include: [ path.resolve(__dirname, "./src") ]
},
// Support for .html as raw text
{
test: /\.html$/,
loader: 'raw-loader',
exclude: [ path.resolve(__dirname, "src/index.html") ]
}
]
},
plugins: [
// Copy static assets to the build folder
new CopyWebpackPlugin([{ from: 'src/assets', to: 'assets' }]),
// Generate the index.html
new HtmlWebpackPlugin({ template: 'src/index.html' })
]
}
|
- The entry specifies the entry files of our Angular application. It will be use by Webpack as the starting point for the bundling process. As you may notice we specify our bootstrap file, but also a new file named polyfills.ts. It will contain all the dependencies needed to run our Angular2 application. Before that, we’ve put those deps directly inside our index.html. They now live in a separate file :
|
|
// polyfills.ts
import 'angular2/bundles/angular2-polyfills';
import 'rxjs';
|
- The output tells Webpack what to do after completing the bundling process. In our case, the dist/ directory will be use to output the bundled files namedapp.bundle.js and polyfills.bundle.js with th following source-map files.
- The ts-loader is used to transpile our Typescript files that match the defined test regex. In our case it will process all files with a .ts or .tsx extension.
- The raw-loader is used to support html files as raw text. Hence, we could write our component views in separate files and include them afterward in our components. You need to install them using npm :
|
|
npm install --save-dev ts-loader raw-loader
|
- The CopyWebpackPlugin is used to copy the static assets into the build folder.
- Finally, the metadata are used by the HtmlWebpackplugin to generate our index.html file. In the index.html, we use the host and port data to run the webpack dev server in development environment. See how this file has been simplified :
1
2
3
4
5
6
7
8
9
10
11
12
13
14
15
16
17
18
19
|
<!DOCTYPE html>
<html>
<head>
<link rel="stylesheet" href="./assets/css/styles.css" />
</head>
<body>
<app>Loading...</app>
</body>
<% if (webpackConfig.metadata.ENV === 'development') { %>
<!-- Webpack Dev Server -->
<script src="http://<%= webpackConfig.metadata.host %>:<%= webpackConfig.metadata.port %>/webpack-dev-server.js"></script>
<% } %>
</html>
|
Feel free to add you own stylesheets files under /src/assets/css as I did with my styles.css file.
You should now have a project structured like so :
1
2
3
4
5
6
7
8
9
10
11
12
13
14
15
16
17
18
19
|
angular2-starter/
├──src/
| ├──bootstrap.ts
| ├──index.html
| ├──polyfills.ts
│ │
│ ├──app/
│ │ └──app.component.ts
│ │
│ └──assets/
│ └──css/
│ └──styles.css
│
├──tsconfig.json
├──package.json
│
└──webpack.config.js
|
We need one more thing to be all set up. As mentionned before, we will write the views in separated file. So, create an app.html file and refer to it in your app.components.ts.
|
|
<!-- app.html -->
<h1>Hello, Angular2</h1>
|
|
|
// app.component.ts
import { Component } from 'angular2/core';
@Component({
selector: 'app',
template: require('./app.html')
})
export class AppComponent { }
|
Finally, we have to install the node typings definition to be able to require file inside our component as we did for the view. Hence, to do so run the following commands, and complete the tsconfig.json to exclude some files :
|
|
# Install Typings CLI utility
npm install typings --save-dev
# Init the typings.json
typings init
# Install typings (DT is "ambient", make sure to enable the flag and persist the selection in `typings.json`).
typings install node --ambient --save
|
As you can notice in my
tsconfig.json file below, there are some extra options that are Atom IDE specific features. Feel free to read the documentation about it:
atom-typescript/tsconfig.json.
1
2
3
4
5
6
7
8
9
10
11
12
13
14
15
16
17
18
19
20
21
22
23
24
25
26
|
{
"compilerOptions": {
"target": "es5",
"sourceMap": true,
"experimentalDecorators": true,
"emitDecoratorMetadata": true,
"module": "commonjs",
"noImplicitAny": false,
"outDir": "built",
"rootDir": "."
},
"exclude": [
"node_modules",
"typings/main.d.ts",
"typings/main"
],
"filesGlob": [
"./src/**/*.ts",
"!./node_modules/**/*.ts",
"typings/browser.d.ts"
],
"compileOnSave": false,
"buildOnSave": false
}
|
Ok! Now it’s time to build and run our application using Webpack. Let’s create some npm scripts to handle those operations.
3. Using npm as a Task Runner
We will simply use npm to define and run our tasks : one for the build process, and one for running the development server.
1
2
3
4
5
6
7
8
9
10
11
12
13
14
15
|
{
"name": "angular2-starter",
"version": "1.0.0",
"description": "",
"main": "index.js",
"scripts": {
"build:dev": "webpack --progress --colors",
"server:dev": "webpack-dev-server --hot --progress --colors --content-base dist/",
"start": "npm run server:dev"
},
...
}
|
Going further
In today’s tutorial, we setup an Angular 2 environment on which you can now build you entire application. We showcased how to structure our project and how Webpack can be used to gain productivity while developping Angular 2 application with Typescript.
If you have been following along with the source or building from scratch, you should now be able to build your own Angular 2 development environment. Else, fork the
Github repo and have fun!
Stay tuned, in the next tutorials we will see how to include unit testing with Karma and Jasmine, and we’ll also use Protactor for end-to-end story.


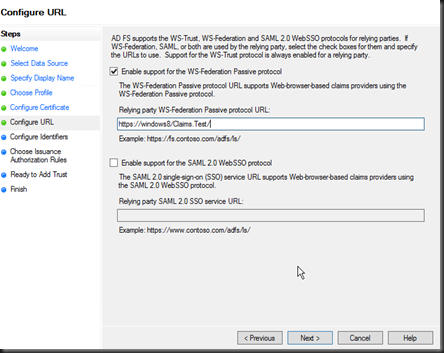
 Once complete your web.config will be modified. The modifications provide the details of the identity provider and changes the application authentication settings and paths to allow for claims authentication. This is a fairly self-explanatory configuration consisting of the audience (your application root URL), The public certificate thumbnail of the issuing identity provider, and the redirection address to the identity provider for authentication (issuer). Realm is the relying party (service-provider) key (name) given to the identity provider to identify your application.


